Stereoscopic Encoding Guide for DivX
This guide has been superseded by the
Stereoscopic Encoding Guide for Windows Media!
Content
Introduction
This guide explains how to encode stereoscopic video files for playback using
Stereoscopic Player or other
software players. I assume you have already edited the video in some video
editing application and want to compress it efficiently now.
First, we have to decide which codec we want to use. Since there is no free
stereoscopic video codec available, we have to use one of the ordinary codecs
available. Currently, the most commonly used codecs are DivX and Windows Media.
This guide explains how to use the DivX codec only.
Required software:
I wrote this guide using VirtualDub, however you can export directly to DivX
format from most video processing applications. By the way, most of the
statements in this guide also apply to monoscopic video compression.
Let's Start
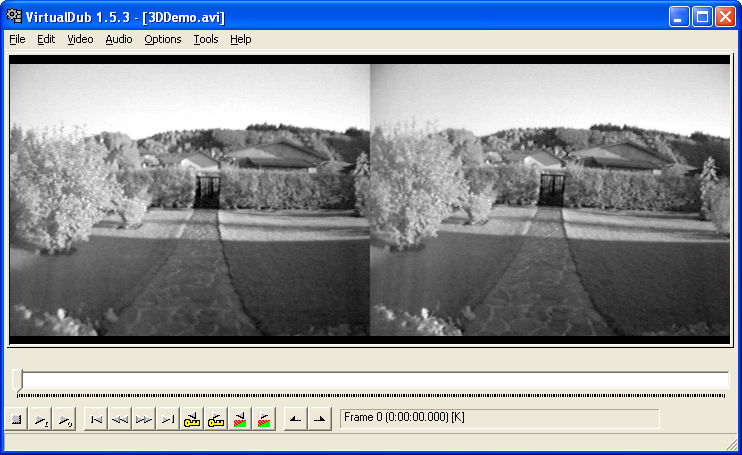
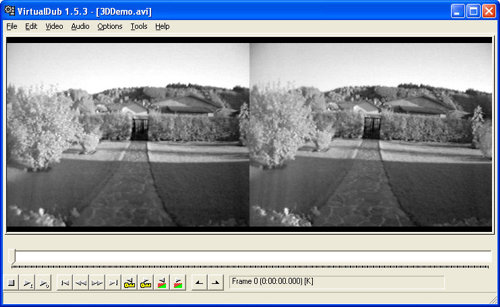
First, run Virtual Dub and open your stereoscopic video file (File->Open
video file). Make sure your video uses side-by-side or above/below layout,
because interlaced layout will cause strong ghosting, even when the
interlaced-option in DivX is used. Any other layouts are not recommended too,
because they are not supported by most player applications, including
Stereoscopic Player. The source file should be only slightly compressed, or even
better, uncompressed (or compressed using a lossless codec) to get best results.
Remember, every time you recompress a video, quality degrades, so avoid lossy
compression during editing as far as possible.
Never encode videos in anaglyph format! All lossy video codecs use color
subsampling (color resolution is reduced to a quarter of original size). Since
anaglyphs store 3D-information in the color channel, the video will look blurred
after applying compression. Use on-the-fly conversion during playback instead.
Audio Settings
Select Video->Fast recompress and Audio->Full processing mode
or Audio->No audio if your video does not have a soundtrack. Next, click
Audio->Compression to select the audio codec. I strongly recommend to use
MPEG Layer-3. If you cannot select more than 56kBits/s, you must install an
appropriate codec first, for example the
Radium MP3 codec.
If your source file audio track uses 44100 Hz, make sure to select a 44100 Hz
item from the list, if your audio track uses 48000 Hz, select a 48000 Hz item.
Some DV recordings use 32000 Hz. In this case, guess what you should select! If
Show all formats is disabled, you see only recommended formats for your
sound track.
There is a bug in the Creative MP3 codec that comes with SoundBlaster cards
which causes conversion to hang on frame 9995. Due to the way that audio codecs
are enumerated in Windows the Creative codec can even be used though you think
you have chosen a different MP3 codec. Disable it or lower its priority in
Control Panel, Multimedia so that, for example, the Radium codec is used.
Video Settings

Click Video->Compression in VirtualDub and select the DivX Pro codec,
then click Configure.
Use the following settings:
| Performance/Quality: |
Slowest |
| Variable bitrate mode: |
Multipass, 1st pass |
| Encoding bitrate: |
Use your desired bitrate, see bitrates. |
| Psychovisual Enhancements: |
Enabled, Slow |
| Pre Processing Source: |
Usually, you should disable this feature. If your movie is
very noisy, enable it and select Light. |
| Source Interlace: |
Encode as progressive |
| Scene change threshold: |
50% |
| Max Keyframe interval: |
300 |
Click Select Profile Wizard on the General-tab and use the same
settings as shown on the following screenshots:
These settings will give the best image quality. Since you can't use DivX for
field sequential videos (all other layouts do not work on TVs), it does not
matter that you won't be able to play the resulting video file on a DivX-capable
standalone DVD player.
Encoding
Click File->Save as AVI and wait until saving is finished. This may
take a long time, depending of your videos duration and your computer.
Since we have chosen multipass encoding, we have to save the file at least
twice. Therefore, click Video->Compression again, select the DivX Pro
codec, then click Configure. This time, select Multipass, nth pass.
Choose the tenfold of the encoding bitrate as maximum bitrate.
Finally, save the video again, using the same filename. Once again you may
have to wait a long time. Although it is possible to use more than two passes,
it will not improve image quality. After saving has finished, play the file to
verify that everything is ok with the file. If image quality is too low, create
the file again (repeat all steps), using a higher bitrate.
Bitrates
Audio bitrates (MP3)
| Low quality: |
64 kbps |
| Middle quality: |
128 kbps |
| High quality: |
256 kbps |
Video bitrates (DivX)
These are suggested bitrates for the most common video resolutions and
framesrates. It is recommended to use one of the resolutions in this list. The
bitrates are only clues, try out different bitrates to find out what bitrate
gives best results with your video.
| Resolution |
Low quality |
Middle quality |
High quality |
320 x 240 Pixel, 30 fps
360 x 240 Pixel, 30 fps
360 x 288 Pixel, 25 fps
384 x 288 Pixel, 25 fps |
250 kbps |
500 kbps |
1 Mbps |
640 x 240 Pixel, 30 fps
720 x 240 Pixel, 30 fps
720 x 288 Pixel, 25 fps
320 x 480 Pixel, 30 fps
360 x 480 Pixel, 30 fps
360 x 576 Pixel, 25 fps
384 x 576 Pixel, 25 fps |
500 kbps |
1 Mbps |
2 Mbps |
640 x 480 Pixel, 30 fps
720 x 480 Pixel, 30 fps
720 x 576 Pixel, 25 fps |
1 Mbps |
2 Mbps |
4 Mbps |
1280 x 480 Pixel, 30 fps
640 x 960 Pixel, 30 fps
1440 x 576 Pixel, 25 fps
720 x 1152 Pixel, 25 fps |
2 Mbps |
4 Mbps |
8 Mbps |
|